Seafood

Baked Haddock Sandwich with Roasted Garlic Aioli (Recipe and Thrive Algae Oil Giveaway)

This post is sponsored by Thrive Culinary Algae Oil. Thank you for supporting these partnerships. All thoughts and opinions expressed here are my own. 

My cooking involves a lot of oil. That's not to say that my food's oily, just that I rely on it as an ingredient for many of our meals. On our counter, there are always a few bottles within arm's reach so I can quickly drizzle over vegetables, add to a hot pan, or whisk in salad dressing. For all of these, I've become quite fond of Thrive Culinary Algae Oil. Now, I'm often skeptical when someone reaches out to me with a product I've never heard of. It rarely falls in line with my cooking style. But I've been using Thrive in almost everything I've made these last few months, and it's found a permanent place in our kitchen. 

When I'm looking at oils, my main priority is that they do what they need to do and I've found that Thrive is a great multi-purpose oil. Its high smoke point (up to 495 degrees F) is perfect for frying, searing, sautéing and roasting. Its neutral taste is ideal for salad dressings and homemade mayonnaise. The added benefit is that Thrive is high in monounsaturated fats (the good kind of fats), making it an excellent alternative to butter and other cooking oils for those looking to help maintain heart health. 

This recipe felt like an appropriate way to showcase the versatility of the oil. Here I've used it in a variety of ways... roasting the garlic, preparing the aioli, and for baking the fish... resulting in a satisfying sandwich you can sink your teeth into.

Curious to try Thrive Algae Oil out yourself? Well, they have generously provided a bottle of oil to three lucky winners!  

Giveaway Details: 
To enter, leave a comment on this post telling me what your favorite sandwich toppings are.  Eligible to US residents only (sorry international friends)! Giveaway ends at 12PM EST on Friday, February 23, 2018. The winner will be notified via e-mail. If the winner does not respond within 48 hours, another name will be drawn. (Note: Be sure to fill out the e-mail field in the comment form) 

BAKED HADDOCK SANDWICH WITH ROASTED GARLIC AIOLI

Servings: 4 sandwiches

Ingredients:
For the baked haddock
1 1/2 lbs haddock fillet, cut into 4-ounce pieces
1/4 cup all-purpose flour
1 1/2 cups panko breadcrumbs
2 teaspoons salt
1 1/2 teaspoons black pepper
2 large eggs
Thrive Algae Oil 

To assemble burgers
Hamburger buns
Garlic aioli
Tomato slices
Pickle slices

Directions:
Preheat oven to 425 degrees F. Line a baking pan with aluminum foil. Using a baking brush or paper towel, spread 1 tablespoon oil on foil.

Add flour to a shallow dish. In another shallow dish, add the panko breadcrumbs. In a shallow bowl, whisk together the eggs. 

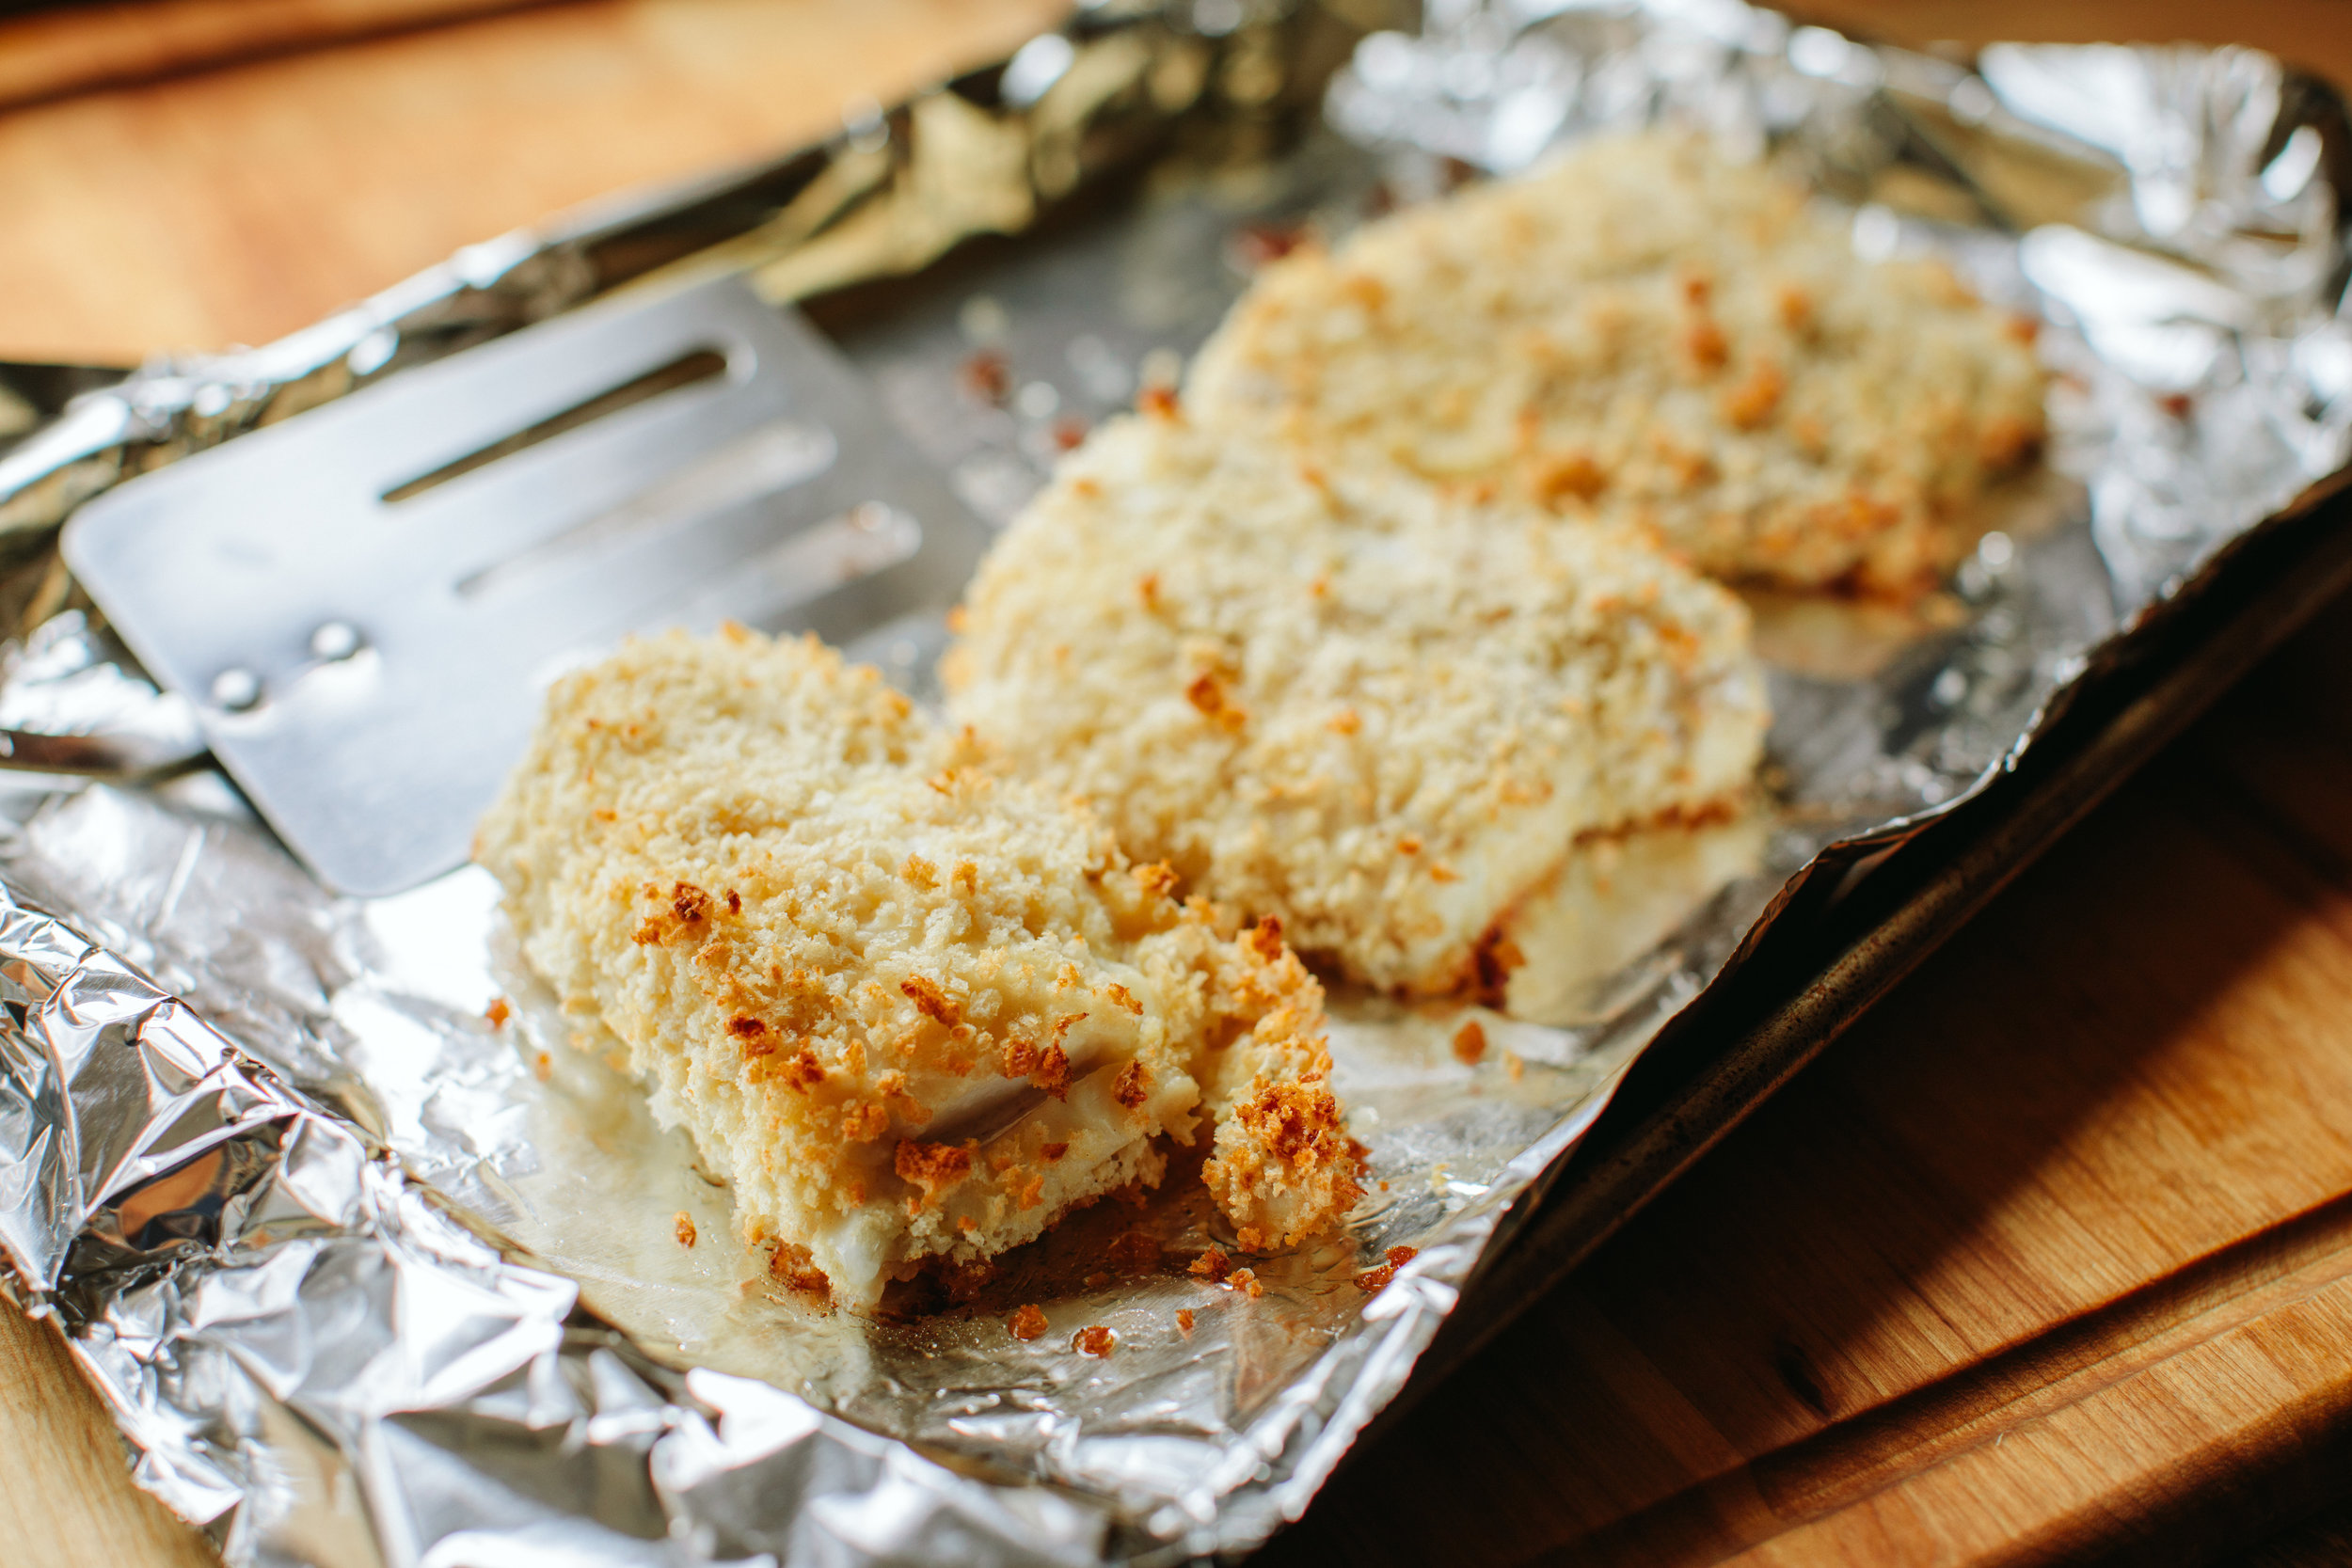
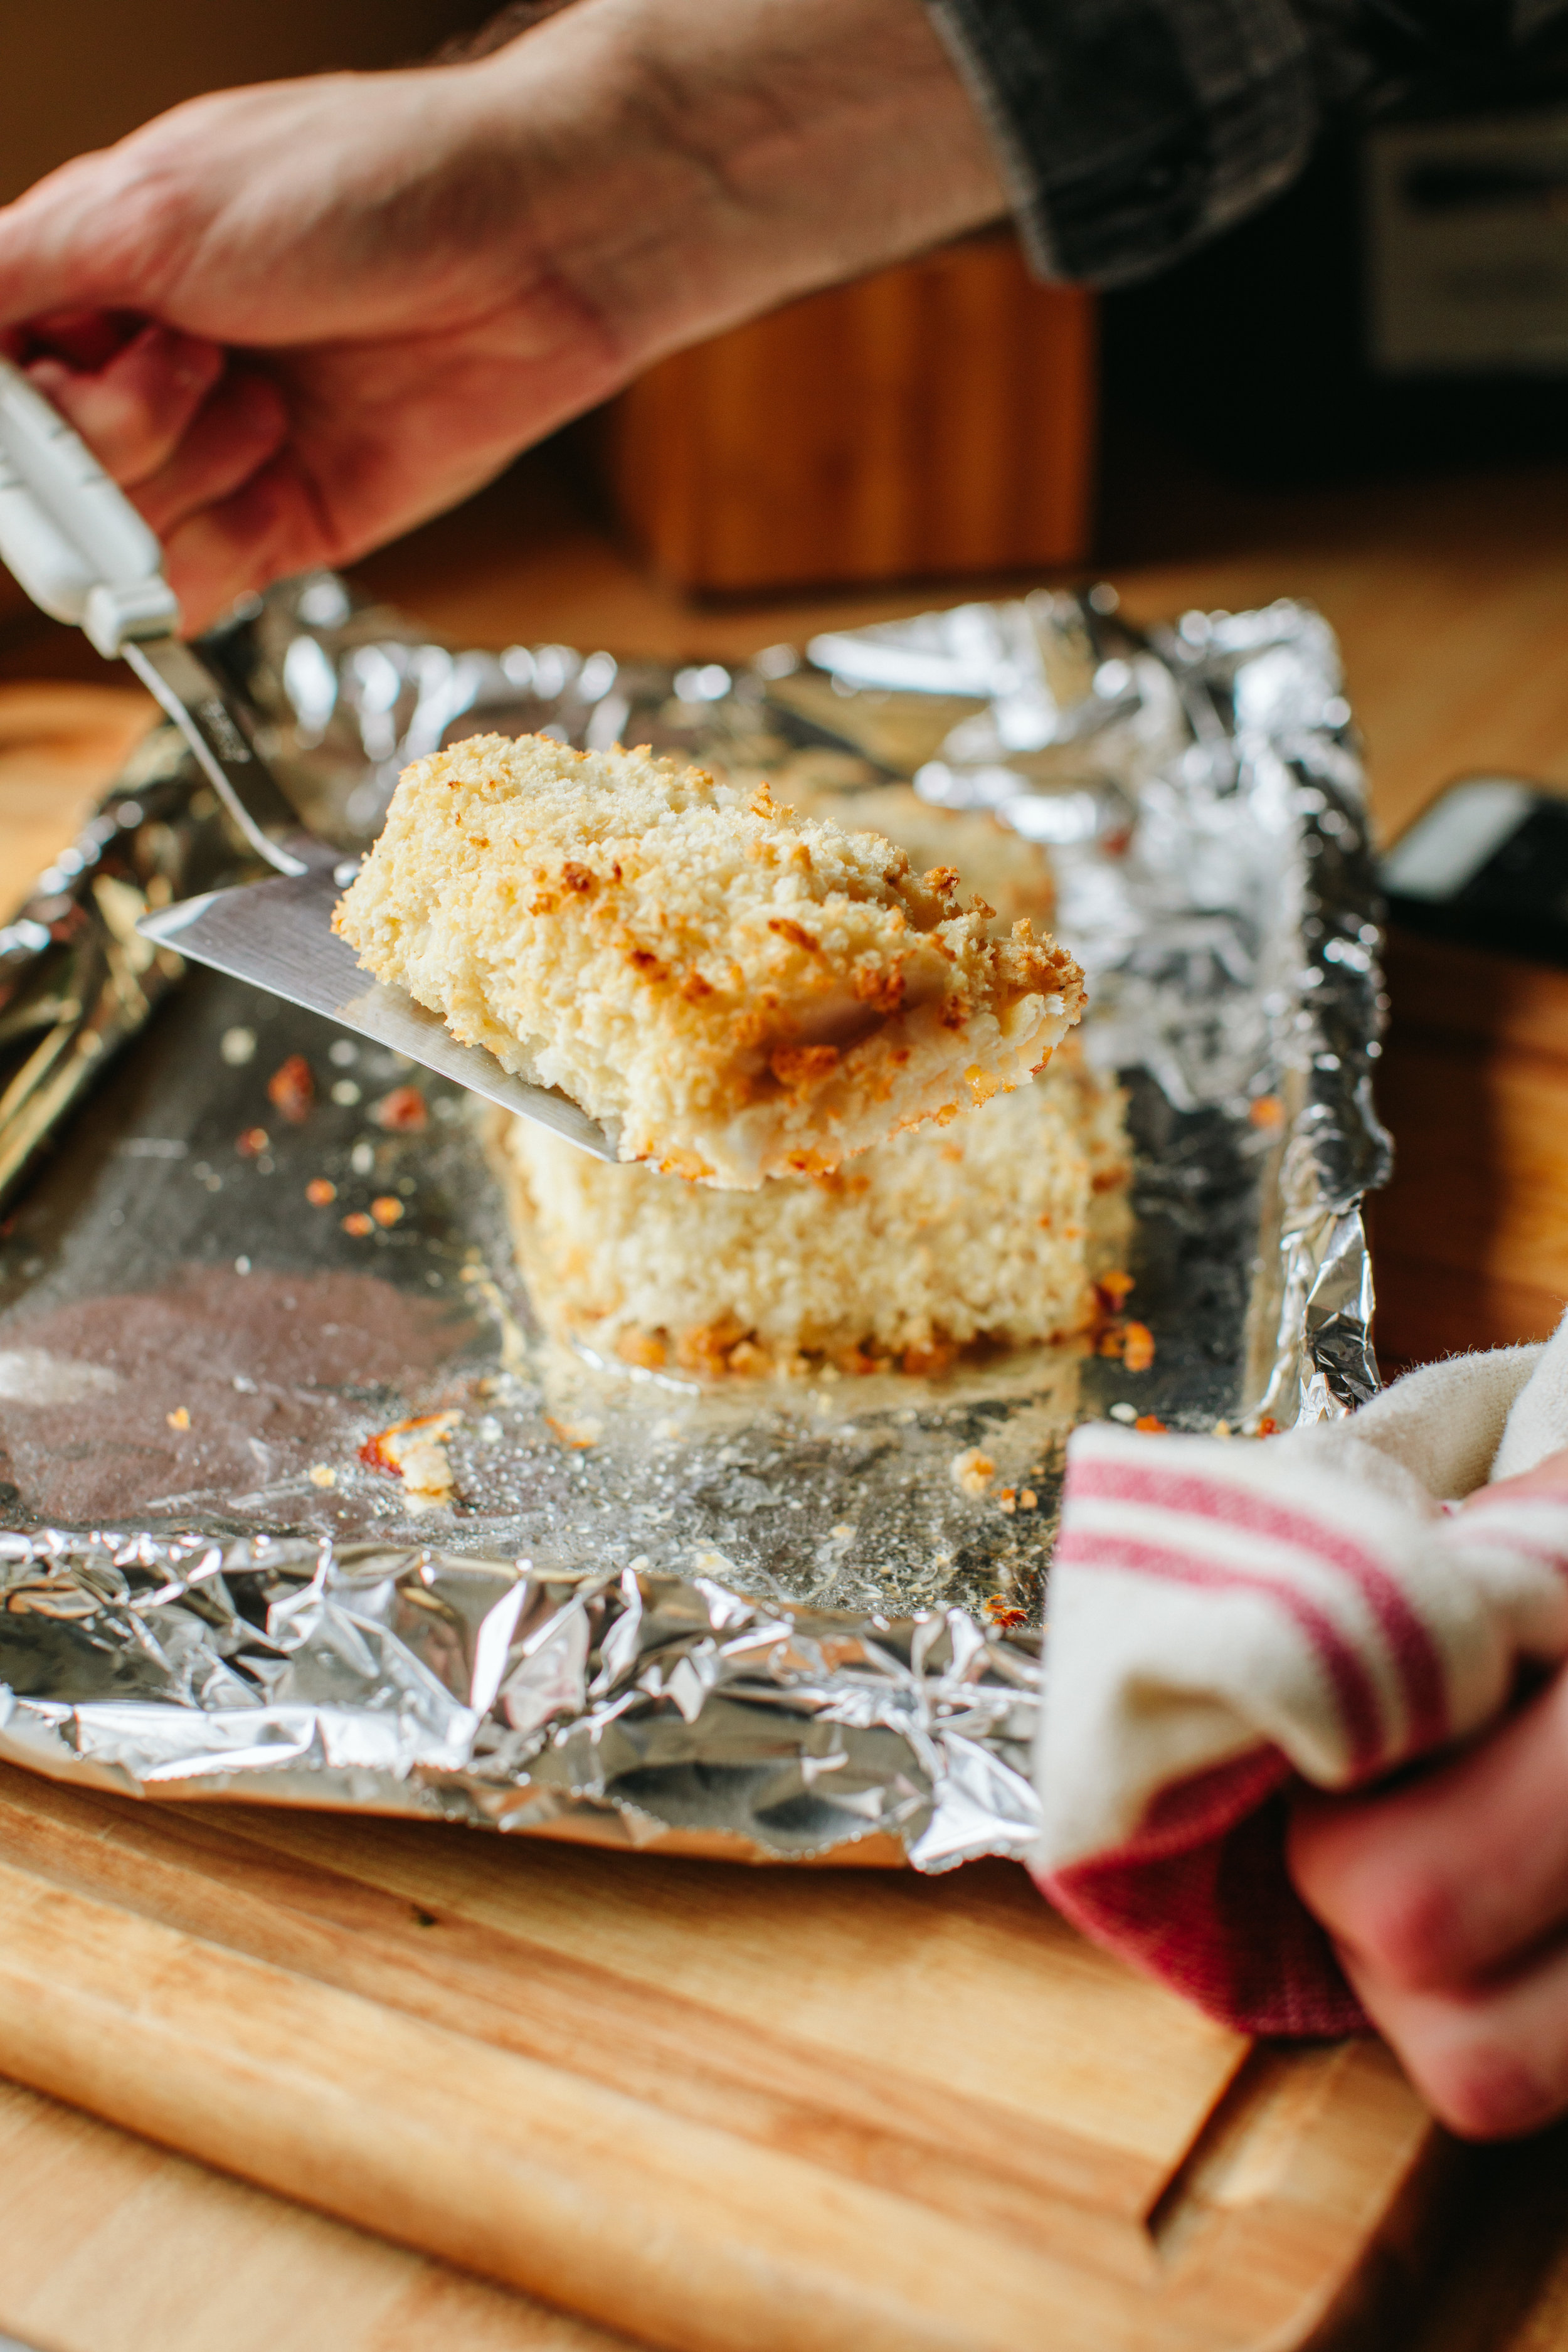
Season haddock with salt and pepper. Dredge in flour, then egg, and finally panko. Transfer to baking pan. Repeat with all fillets. Bake in oven for 18-20 minutes, until flaky and golden brown. 

To assemble the sandwiches, spread garlic aioli on both halves of the hamburger buns, add a tomato slice to the bottom, followed by the fish and the pickles. Top with the second half of the bun. 


ROASTED GARLIC AIOLI

Yield: 1 cup aioli

Ingredients:
Whole head of garlic, outer skin removed
3/4 cups Thrive Algae Oil, plus more for drizzling on garlic
1 large egg yolk
Juice of 1/2 lemon
1 teaspoon salt

Directions:
Preheat oven to 400 degrees with the rack positioned in the middle. 

Using a knife, trim 1/4" off the top of the head of garlic, which will reveal the tips of the cloves. Place heads of garlic (you can do 3-4 at a time), in the center of a large piece of aluminum foil. Drizzle a few teaspoons of the oil on top of exposed garlic cloves. Wrap tightly in aluminum foil and transfer to oven. Bake for 55 minutes (checking after 40 minutes), or until it turns a golden brown color. 

Let the garlic cool before handling. Press the bottom of the clove to push it out of its skin. The garlic can be used immediately or stored in the fridge for up to 2 weeks.

To make the aioli, mash the roasted garlic in a large bowl until it turns into a paste. Add egg yolk, lemon juice, and 1 teaspoon salt and whisk to combine.   While whisking, slowly drizzle in the oil until the mixture begins to emulsify.  Continue to whisk in the oil until mixture has achieved a thick, mayonnaise-like consistency. Alternatively, this can be done using an immersion blender by placing the ingredients in the cup of an immersion blender and blending until it forms an aioli. It can be stored in an air-tight container in the fridge for up to 3 days.

Homemade Gravlax (Cured Salmon)

I have a deep love for smoked and cured salmon. Well, any fish, really. Salmon, though, is my #1 favorite. WhIle some people put tiny cuts of lox on their bagels, I want a mound on mine. Ideally there's a greater salmon to bagel ratio. If I haven't made myself clear, I can't get enough of the stuff. So, when I first learned of gravlax from my mother-in-law, I knew I needed it in my life. Gravlax is a Nordic recipe that involves curing salmon (or any other fatty fish) in salt, sugar, pepper, and dill.  Once these ingredients have been rubbed all over the fish and arranged so that the two fillets are placed with the flesh sides pressed against each other, the salmon is then wrapped in aluminum foil.  At this point, it is left in the fridge, set in a pan with a weight on top of it, for 48 hours. For a number of years, we made it fairly often. While it's not difficult to prepare, it does take some forethought. To have it on Sunday, I'd have to get everything ready on Friday. 

However,  we recently acquired two Himalayan salt blocks, so I thought I'd give it a try using those. Not only were the results delicious, but the preparation was cleaner and faster (it takes less time to cure... closer to 36 hours). Of course, I don't expect people to have salt blocks, so I've included two recipes below. Enjoy this as an appetizer at Christmas dinner or your New Year's Eve party or for a very special Sunday brunch. 

HOMEMADE GRAVLAX (Using Salt Block)
Yield: 4-6 servings
Tools: baking pan, aluminum foil, 2 Himalayan salt blocks

Ingredients:
1 1/2 lbs salmon fillet (skin on)
Large bunch of fresh dill
Lemon (optional)

Directions:
Line a large baking pan with aluminum foil. Place one of the salt blocks on the pan and cover the surface of the salt block with a bunch of dill.

Using a sharp pairing knife, score the skin of the salmon with 3-4 incisions. Lay the salmon fillet on top of the salt block, skin-side down. Cover the flesh of the salmon with more fresh dill and place the second salt block on top. Transfer to the refrigerator. Let cure for 36 hours. 

Before slicing, remove the dill.

Slice thinly and serve with bagels or pumpernickel bread.  It is tasty with either cream cheese or butter.  A nice mustard sauce would work nicely as well.  Or just a couple lemon wedges.


HOMEMADE GRAVLAX (Without Salt Block)
Yield: 4-6 servings
Tools: baking pan, aluminum foil

Ingredients:
2 - 1.5 lb salmon fillets (skin on)
1/3 cup kosher salt
1/3 cup sugar
3 tablespoons white pepper
Large bunch of fresh dill
3 tablespoons gin

Directions:
Mix the salt, sugar, and white pepper in a bowl.  Lay out two sheets of aluminum foil that are 6 inches longer than one of the fish fillets on a roasting pan or another rimmed baking dish that is big enough to hold the fish.  Rub the fish with the salt/sugar mixture on both sides of each of the fillets.

Lay one fillet, skin-side down, into the baking dish.  Cover the flesh side with heaping handfuls of fresh dill.  Drizzle with the gin.  Place the remaining fillet, flesh side down, on top of the other piece of fish.  Fold the ends of the aluminum foil over the fillets so that it completely wraps the fish.  Wrap with another two sheets of foil, so it is tightly packaged up.  Place a weight (I use another heavy, but smaller, baking dish and then fill it with oranges and grapefruits) on top of the fish and let sit in the fridge, flipping every 12 hours, for 48 hours.

Before slicing, remove the dill.

Slice thinly and serve with bagels or pumpernickel bread.  It is tasty with either cream cheese or butter.  A nice mustard sauce would work nicely as well.  Or just a couple lemon wedges.

Salt Cod and Sweet Potato Latkes

Originally, these weren't going to be latkes. It was going to be a Spanish tortilla. We had quite a few of them while we were in Madrid a few months ago, and one of the more memorable variations contained salt cod. I made a mental note to recreate it at home. When we returned, I started with regular, plain potatoes, and then moved up to sweet potato. By the time I got to work on one with salt cod, however, I realized that we were quickly approaching Hanukkah and felt that a latke was a more fitting preparation. And that's how I ended up here. I know you're probably thinking: Great story. Move on already, Brian! Just tell us how they turned out. Well, in my humble opinion, I think they're pretty awesome. If you're serving latkes to first-timers or to folks who will freak if they're not traditional, well, then I wouldn't try these out on them. But if you're with some more adventurous folks, then I think they'll be totally into these. 

Salt Cod and Sweet Potato Latkes
Yield: 24 latkes

Ingredients:
1/2 lb salt cod
1 lb peeled sweet potatoes, coarsely grated
1/2 cup grated white onion
1/3 cup flour
2 eggs, lightly beaten
1 teaspoon salt
1/2 teaspoon black pepper
Vegetable oil

Crème fraiche, optional
Chopped chive, optional
Lemon wedges, optional

Directions:
Place salt cod a shallow glass baking dish and cover with cold water. Soak the salt cod overnight.

Strain salt cod and place in a pot with fresh water. Set over medium-high heat. Bring to a boil and cook for 10 minutes. Strain of water and transfer cod to a bowl. Flake fish with a fork.

In a separate bowl, mix together the grated sweet potato and onion, followed by the egg. Add flour, salt, and pepper and mix to combine. Fold in the salt cod.

Set a large non-stick skillet over medium-high heat. Add 3 tablespoons vegetable oil. When the oil begins to shimmer, you can start cooking the latkes. Working in batches, spoon 1/4 cup of the batter into the skillet for each latke. Using a spatula, press down lightly to form a pancake shape. Cook for 2 minutes on each side, until golden-brown.

Transfer to a plate lined with paper towel. Serve with crème fraiche and chopped chive on top and lemon wedges on the side.